相关文章
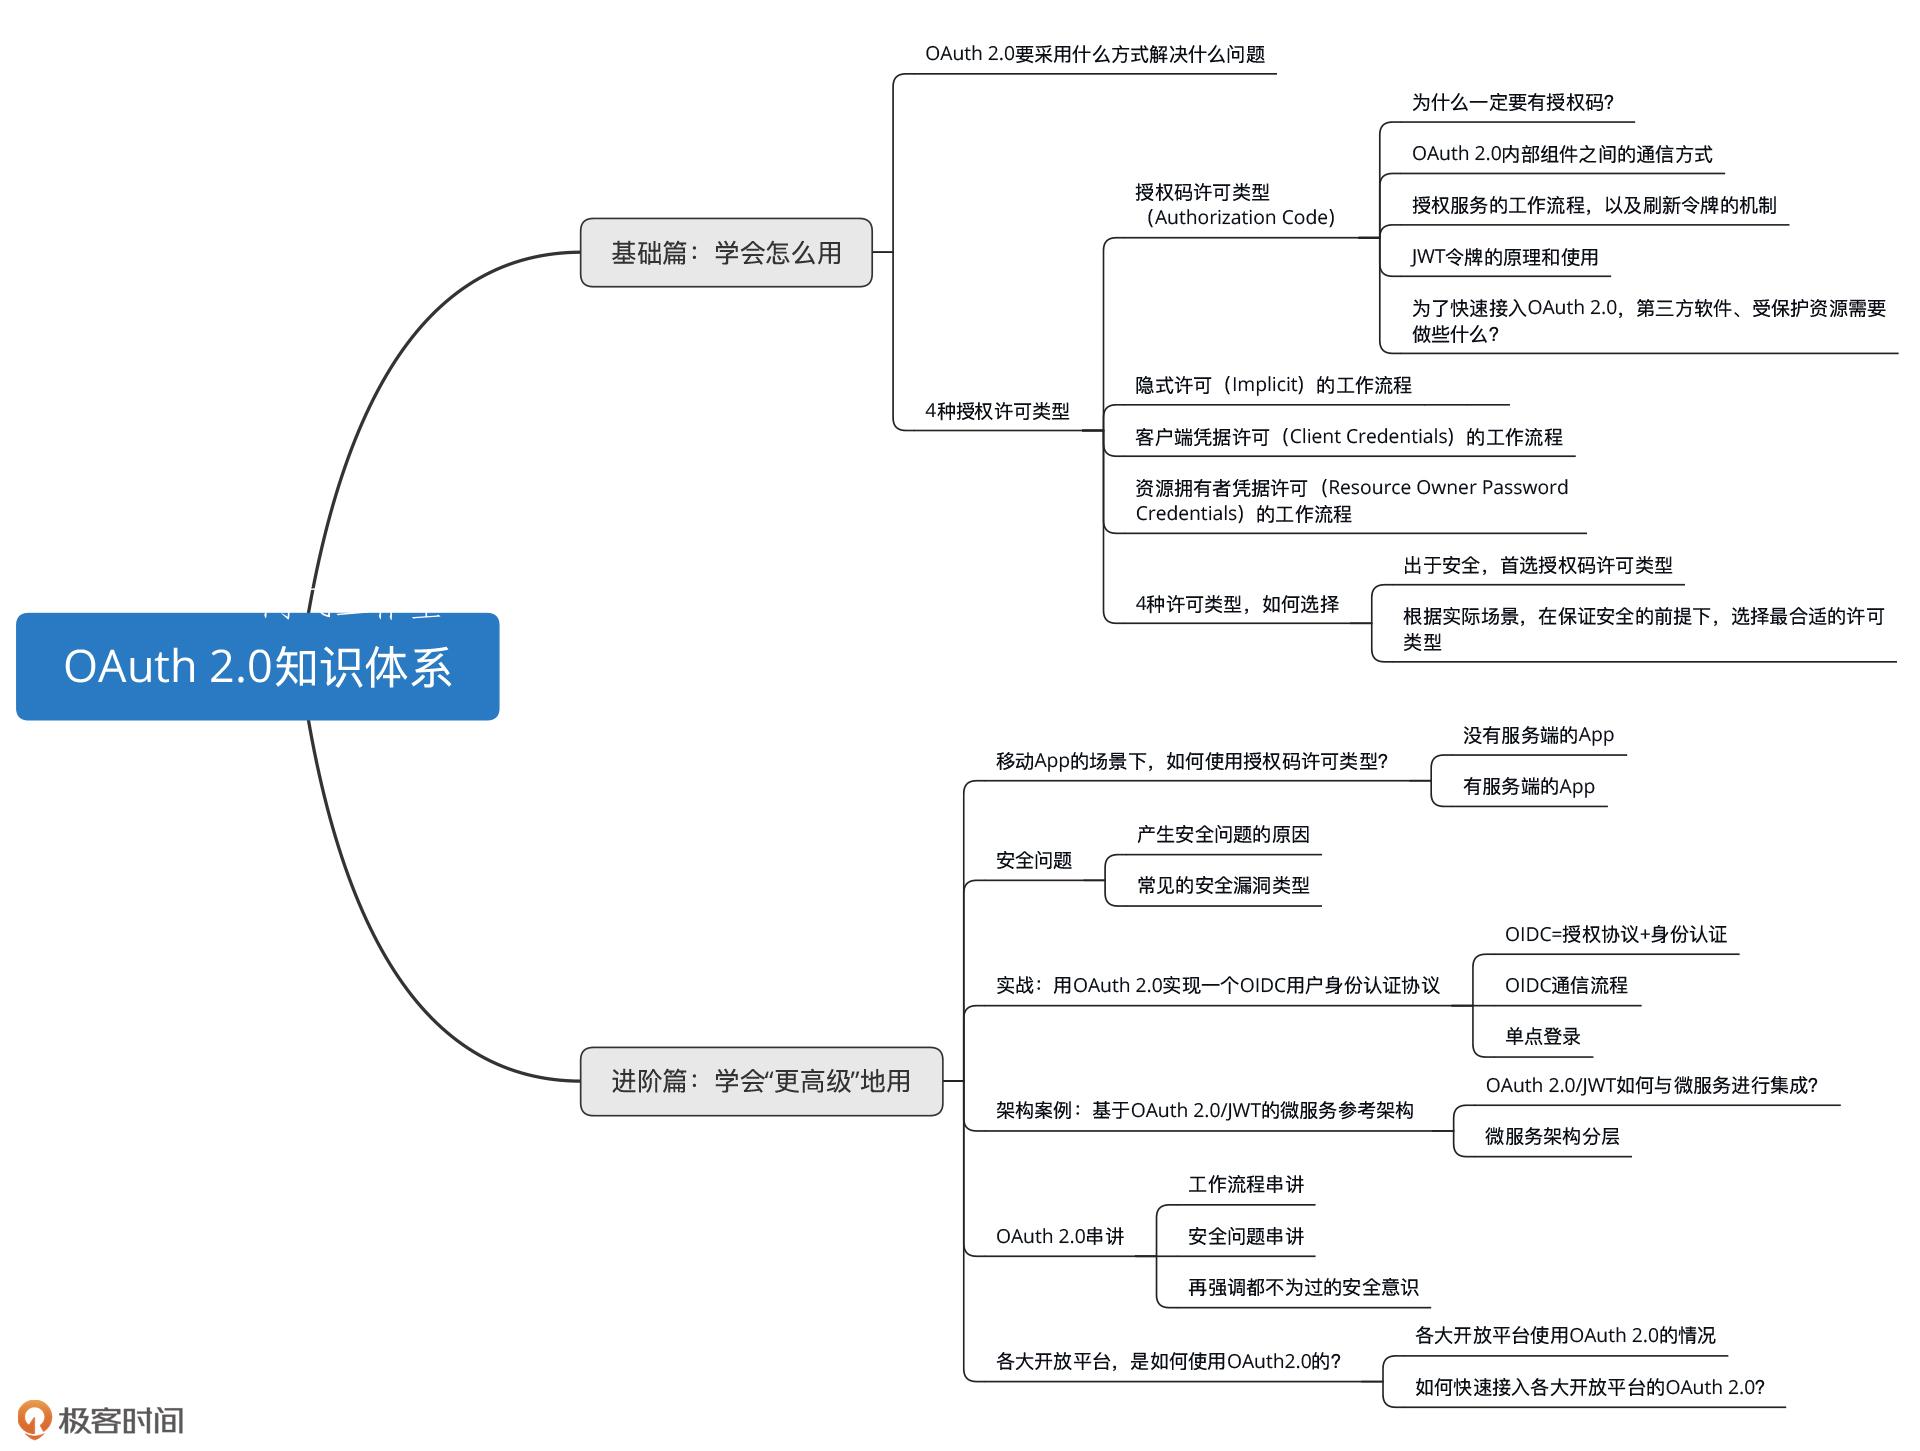
为什么要学OAuth 2.0?
OAuth 2.0 是什么?那,OAuth 2.0 到底是什么呢?我们先从字面上来分析下。OAuth 2.0 一词中的 “Auth” 表示 “授权”,字母 “O” 是 Open 的简称,表示 “开放” ,连在一起就表示 “开放授权”。这也是...
01 | OAuth 2.0是要通过什么方式解决什么问题?
OAuth 2.0 是什么?用一句话总结来说,OAuth 2.0 就是一种授权协议。那如何理解这里的“授权”呢? 我举个咱们生活中的例子。假如你是一名销售人员,你想去百度拜访你的大客户王总。到了百度的大楼之后,保安拦住了你,问你要工牌。你...
02 | 授权码许可类型中,为什么一定要有授权码?
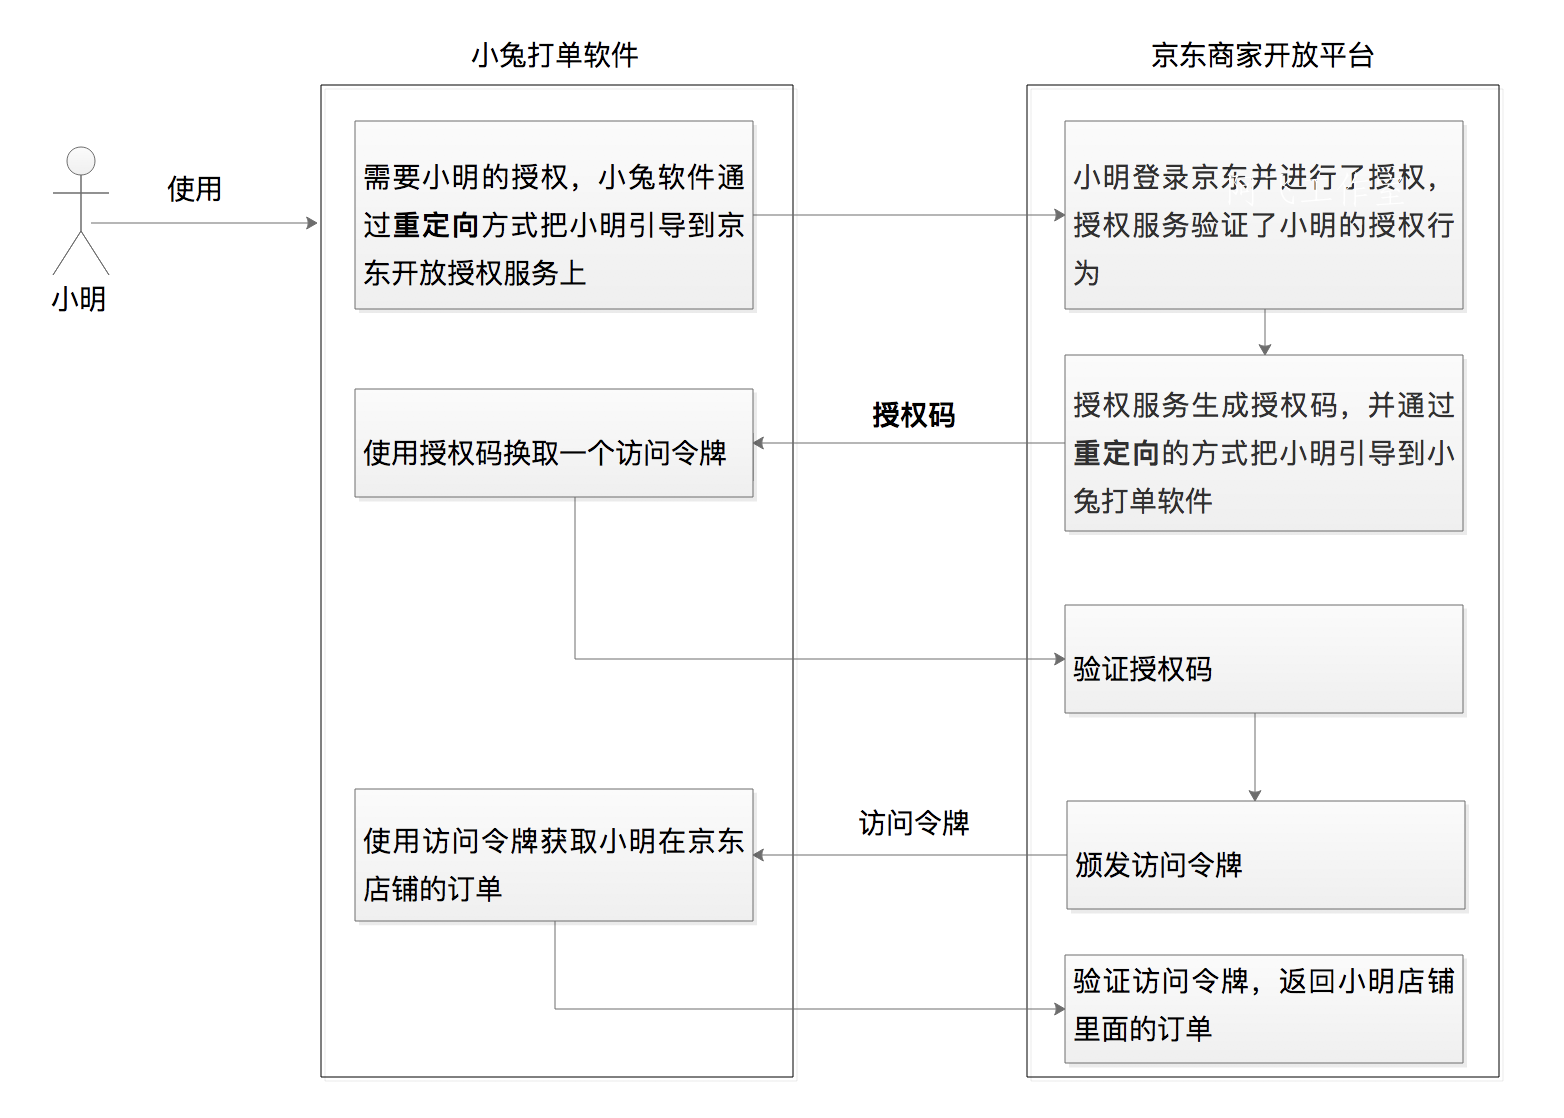
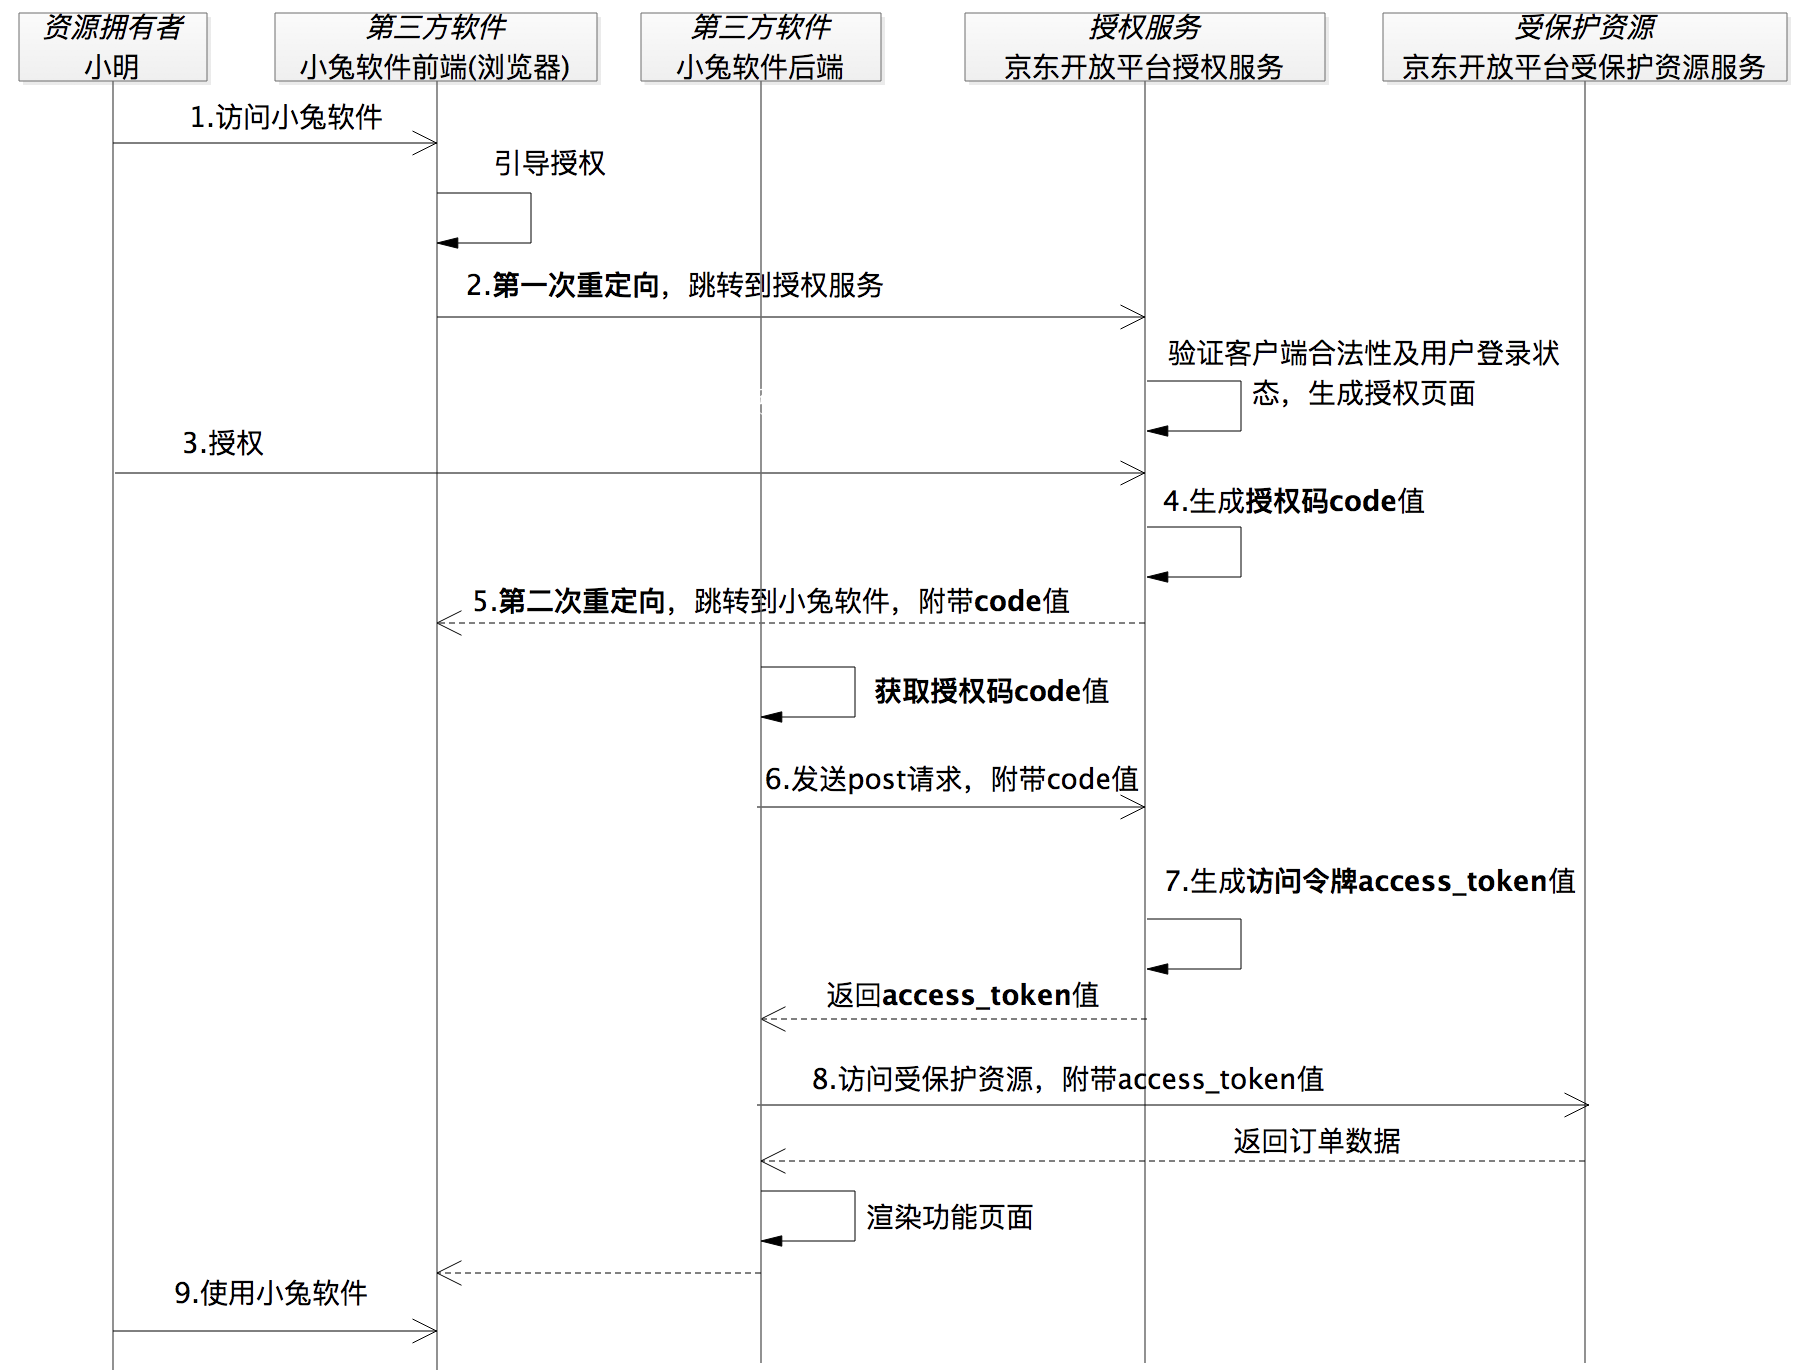
为什么需要授权码?在讲这个问题之前,我先要和你同步下,在 OAuth 2.0 的体系里面有 4 种角色,按照官方的称呼它们分别是资源拥有者、客户端、授权服务和受保护资源。不过,这里的客户端,我更愿意称其为第三方软件,而且在咱们这个课程中,都...

03 | 授权服务:授权码和访问令牌的颁发流程是怎样的?
授权服务的工作过程开始之前,你还是要先回想下小明给小兔软件授权订单数据的整个流程。 我们说小兔软件先要让小明去京东商家开放平台那里给它授权数据,那这里是不是你觉得很奇怪?你总不能说,“嘿,京东,你把数据给小兔用吧”,那京东肯定会回复说,“...

04 | 在OAuth 2.0中,如何使用JWT结构化令牌?
JWT 结构化令牌关于什么是 JWT,官方定义是这样描述的: JSON Web Token(JWT)是一个开放标准(RFC 7519),它定义了一种紧凑的、自包含的方式,用于作为 JSON 对象在各方之间安全地传输信息。 这个定...

05 | 如何安全、快速地接入OAuth 2.0?
构建第三方软件应用 我们先来思考一下:如果要基于京东商家开放平台构建一个小兔打单软件的应用,小兔软件的研发人员应该做哪些工作? 是不是要到京东商家开放平台申请注册为开发者,在成为开发者以后再创建一个应用,之后我们就开始开发了,对吧?没错...
发表评论

